
Brown paper stars create a quiet holiday display with a material that often arrives with deliveries. Choose clean, uncoated paper and build a simple layered shape. Small stars can decorate packages; larger ones work as a lightweight wall arrangement.
Prepare clean paper
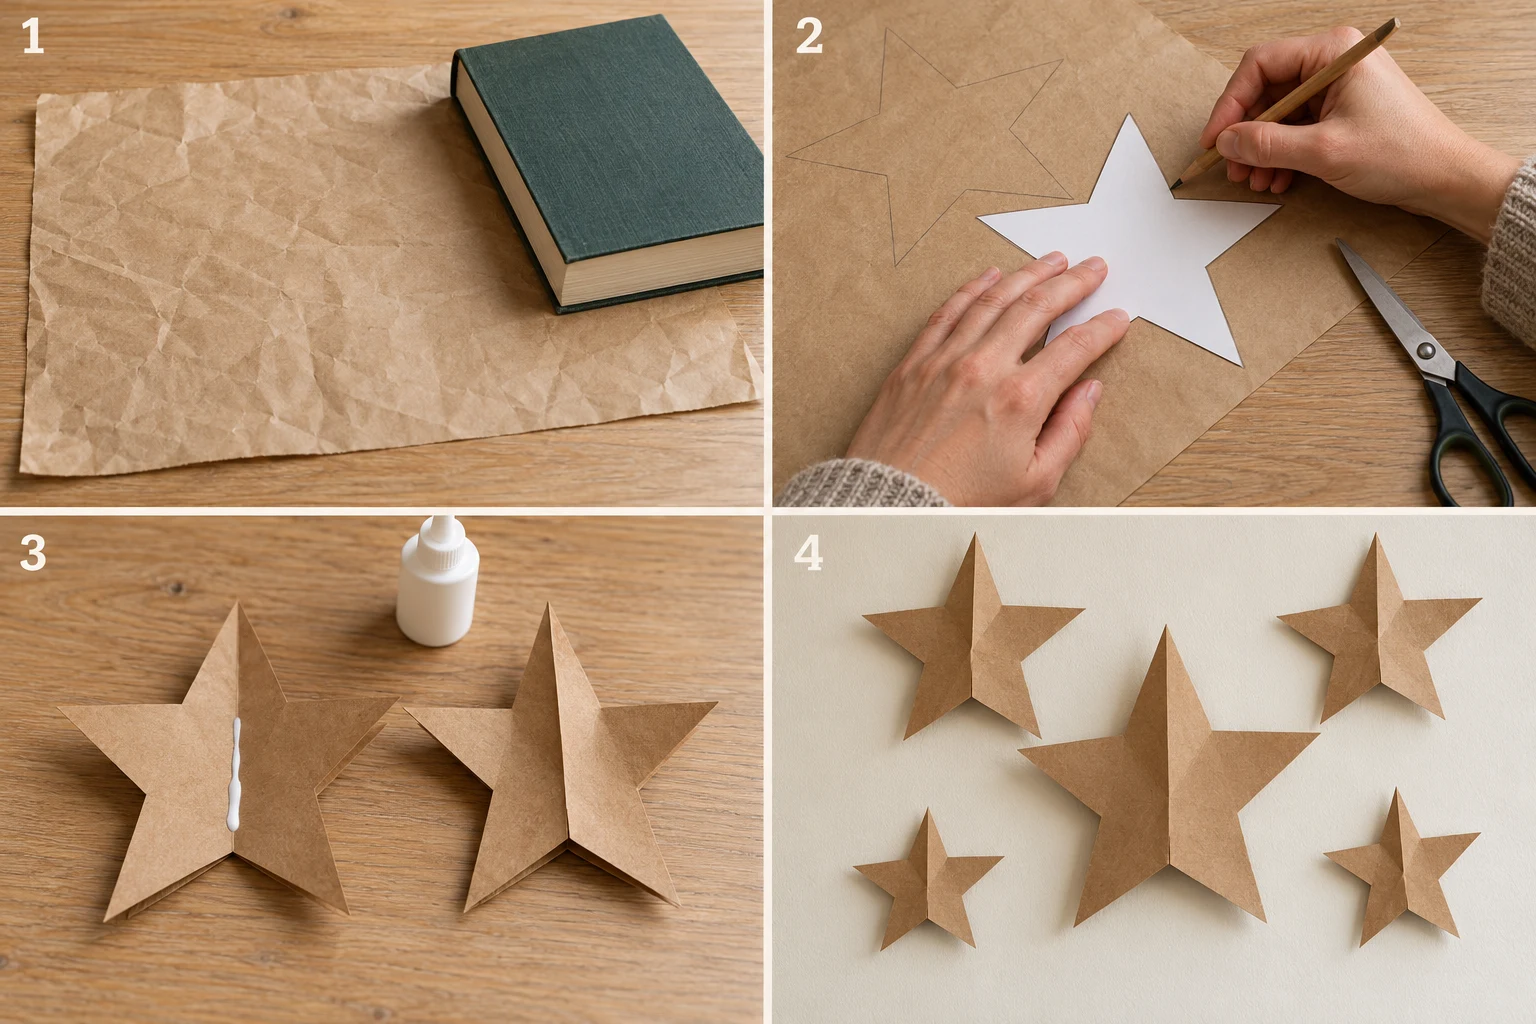
Flatten the paper under a book and remove tape, labels, and damaged areas. Avoid using material that has touched food or anything oily. Make a small test fold to see whether the fibers hold a crease. Thin packing paper may need two layers, while heavy paper works better as a flat cutout.
Draw one reusable template
Use a pencil to sketch a five-point star on scrap cardstock, then cut it out and refine the shape. Trace several sizes onto the brown paper, leaving enough room between them for cutting. Cut slowly at the inner corners so the points do not tear when you separate the shapes.
Create a simple raised center
Fold two matching stars down their center lines and join them along the crease with suitable paper glue. Leave the outer points loose so they can open slightly. Dry the piece flat according to the adhesive instructions. A single flat star also looks lovely if the paper is too stiff for a raised design.
Arrange before mounting
Lay the stars on the floor in the arrangement you want, then transfer the pattern to the wall with suitable low-weight mounting products. Keep paper clear of lamps and heat. Photograph the arrangement before taking it down, and store the stars flat between larger sheets of paper to protect their points.